Raw Onion & The Flu

January 17, 2014

Raw ONION on bottom of the feet to take away illness.
During the night, I started feeling good. I mean really good! I felt tingly, like my blood was being cleansed (it was). It was so cool!
My bedroom smells like a casserole, but it was totally worth it!
***Here is the deal:::
So last night Evan (11) was keeping everyone awake with his cough. I got up, went to the kitchen and sliced a purple, make me cry onion, at 3am. I got some snug socks and put it on the bottom of his feet. To boost my own immunity, I decided to try this too. During the rest of the night, I started feeling good. I mean really good! I felt tingly, like my blood was being cleansed. It was so cool!

This works in 2 ways.
1.) Onions are known to absorb toxins. In fact, during the days of the Plague in England, folks would keep chopped onions around to absorb toxins and clean the air. This helped protect them, against getting the plague.

NEVER SAVE AN ONION. It will absorb all the toxins in the air of your refrigerator. Eat that and you eat the toxins. Instead: Chop your left over onion, put it on a plate and keep it in your kitchen as a natural air purifier. I do this all the time! If someone is ill, place a chopped onion on the night stand, next to the bed. They’ll be better in the morning. I placed the remaining onion, next to Evan last night.

Onions are toxin absorbers. Thus why they are great internal mops for the body. Eat plenty of onions!

2.) The onion and garlic families are anti-microbial and anti-bacterial. Placing them on the bottom of the foot gives them access to your internal organs through meridians in your body. The onion can be directly delivered. Transdermal delivery (on the skin) is one of the best delivery mechanisms, as it will bypass the stomach acids and go directly into the blood. The bottom of the feet and the forearm are great places to put high powered foods and essential oils into the body. Sliced garlic on the bottom of the feet will work nicely too.

Evan woke up cough free and hopped on the bus this morning.

Happy kid. Happy mom.Image

spice blends

September 9, 2013

Chili Powder: ground chilis (I tend to keep several varieties around, and use them in combination), fresh chilis, fresh garlic or garlic powder, ground cumin, dried oregano or thyme.  Optional: cinnamon, epazote, cloves, cocoa powder.

Curry Powder: (the big ones): ground turmeric, black and white pepper, cardamom, cumin, coriander seed, cinnamon, ground or fresh ginger; (use in lesser quantities): cloves, cayenne, mace or nutmeg, fennel seed, bay leaf, fenugreek, mustard seeds, asafoetida.

Apple Pie Spice: ground cinnamon, nutmeg, ground ginger, ground cloves, maybe allspice.

Pumpkin Pie Spice: ground cinnamon, ground ginger, nutmeg, ground cloves.  Optional: allspice, black pepper.

Pickling Spice: (use whole) mustard seed, coriander seed, chili flake, fresh garlic, bay leaf, fresh dill or parsley.

Mulling Spices: (for cider or wine, use whole) cinnamon, cloves, allspice, star anise, orange peel, black peppercorns.

Old Bay Seasoning: celery seed, paprika, black pepper, cayenne, bay leaf, mustard powder, ground allspice, ground mace.

Seasoned Salt: (in addition to the salt) fresh garlic or garlic powder, celery seed, onion powder (or just put onions in whatever you’re cooking), paprika, white pepper, turmeric.

Lemon Pepper: (this one should be obvious) lemon zest, black pepper.

Whole spices, toasted and then ground, will offer the biggest flavor, but pre-ground are fine, too (except for nutmeg, which you should always grate fresh).

body pH

August 13, 2013

Bacteria, viruses, mold, fungus, parasites & cancer thrive in an acidic body, but can not survive in an alkaline environment.
**Do you know the pH levels in your body? While this is one of the best (and easiest) indicators of great health, it is also the most under utilized. Optimal pH levels is 7.35, or close to this. While the pH of your saliva can vary greatly (depending on your last meal), the pH of your urine is often a reflection of the pH of your tissues. Test your 1st morning urine & again about 2pm. Your am urine will may be slightly more acidic, as you are throwing toxins off at night. If you are 4, 5 or 6…. your body is screaming something to you. Bacteria, viruses, mold, fungus, parasites & cancer thrive in an acidic body, but can not survive in an alkaline environment. You can bring your pH levels up by changing your diet. Add in plenty of greens & fresh green juices. If you are super low, you want to seek the guidance of a holistic health professional. You may want to consider sodium bicarbonate, chlorine dioxide (MMS), mineral rich salts and hydrogen peroxide drips, or baths. The book pH Miracle, by Dr. Robert Young is a great resource to learn about the pH of the body. I have books & books of these pH strips. They are cheap & tell you a great story about your current health! At The Raw Food Institute, we teach you how to dramatically flip your internal environment–with food. This creates, an abundantly radiant & healthy ecosystem inside of you…. ~Lisa Wilson

science of fudge

July 15, 2013

The Physical Chemistry of Making Fudge
Article #871

by Sue Ann Bowling


This article is provided as a public service by the Geophysical Institute, University of Alaska Fairbanks, in cooperation with the UAF research community. Dr. Sue Ann Bowling is an Associate Professor of Physics at the Institute.


There’s a lot of physical chemistry involved in making old fashioned fudge. The recipe calls for combining and boiling milk, bitter chocolate or cocoa, and sugar together until the temperature of the syrup reaches 238 degrees F (114o C), pouring the seething mixture into a bowl, cooling to 115 degrees F (46 degrees C), and then beating until the surface shine disappears. If you don’t follow the cautions in the recipe — wash down the sides of the pan with a wet pastry brush or cover the pan for a few minutes early in the cooking process; don’t scrape the pan; don’t disturb the candy until it’s cooled; don’t let anything, even a speck of dust, fall into the cooling syrup — you are very likely to wind up with a coarse, gritty mass instead of creamy fudge.

Sugar dissolves far less readily in cold liquids than in hot. There is no way that two cups of sugar will dissolve in a cup of milk at room temperature. Heating the sugar and milk mixture allows the milk to dissolve more and more sugar, and by the time the mixture is boiling, all the sugar is dissolved. The general principle is that at a particular temperature, a given solvent (in this case, milk) can dissolve only so much of a particular solute (sugar). When the milk has dissolved all the sugar it can hold, and there is still some undissolved sugar left, the mixture is said to be saturated. The higher the temperature, the more concentrated the saturated solution becomes.

Water (and milk) boil at 212 degrees F (100 degrees C) at sea level, but the sugar changes that. In general, a solid dissolved in a liquid makes it harder for the liquid molecules to escape. Consequently, the solution has to be hotter for the liquid molecules to get away at the same rate, and the boiling point rises.

In our fudge, the rise in boiling temperature is an exact function of the amount of sugar in the solution. Consequently, we can use the temperature of the boiling syrup to tell when enough water has boiled away to give the syrup the right ratio of sugar to water. For fudge and similar creamy candies, the syrup should boil at a temperature 26 degrees F (14 degrees C) hotter than the boiling point of plain water.

Some of the initial water in the syrup has now boiled away. Because the sugar couldn’t dissolve completely until the mixture was near boiling, the syrup reaches saturation very soon after it starts to cool. If you’ve done everything right, however, sugar does not come back out of solution. Instead, the syrup continues to cool as a supersaturated solution. The solid phase — in this case, sugar — cannot start to crystallize without something to serve as a pattern, or nucleus. However, if a single sugar crystal is present, the syrup will start to crystallize, the crystals will grow steadily as the syrup continues to cool, and the result will be very grainy fudge.

This is why most fudge recipes require that the sides of the pot be washed down early in the cooking process, either with a wet pastry brush or by putting the lid on the pan for about three minutes to remove any sugar crystals clinging to the container walls. It is also why the recipes specify that the sides and bottom of the pan should not be scraped into the bowl where the candy is to cool. There is too much chance of scraping in a stray sugar crystal.

As the cooling syrup gets more and more supersaturated, its tendency to crystallize becomes even stronger. Even a speck of dust can start the process if all the candy contains is sugar, milk, and chocolate. Using more than one kind of sugar can counter this tendency. Most fudge recipes contain either corn syrup (which contains glucose instead of the sucrose of table sugar) or cream of tartar (which breaks sucrose into glucose and fructose). The different sugars tend to interfere with each other’s crystallization and minimize the chance that the candy will crystallize too soon. They must be used in moderation, however — too much and the fudge will remain a thick syrup forever!

The final stage is stirring the syrup when it is lukewarm to promote crystallization all at once throughout the candy. Disturbing (stirring) a very supersaturated solution causes many crystals to form at once. Because they compete with each other for the dissolved sugar, none can grow very large. The result is the proper creamy texture of fudge and the change in appearance from shiny (supercooled liquid) to dull (a mass of very tiny crystals).

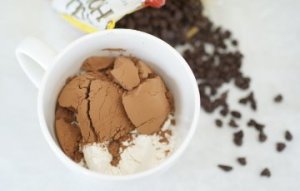
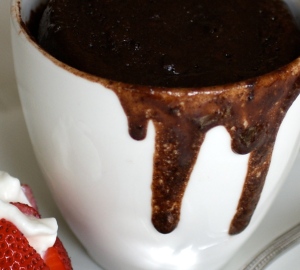
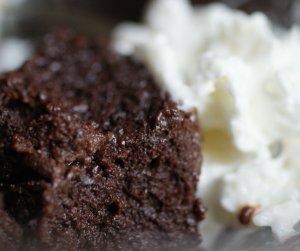
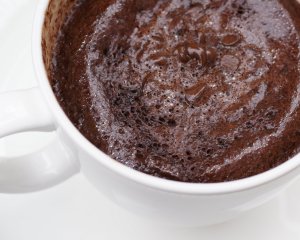
Low Fat Vegan Chocolate Mug CakePosted by: Lindsay

June 9, 2013

Low Fat Vegan Chocolate Mug Cake

Posted by: Lindsay S. Nixon | 61 Comments

Category: Recipe

Tomorrow is the official release date for my new book, Everyday Happy Herbivore– I can’t believe it’s here! Thank you all for your support, I’m so happy to be able to write these recipes for you.

Today, I’m sharing one last cookbook teaser with you..and boy is it a great one. This chocolate mug cake will go from flour to in your mouth in just five minutes. It’s a great single serving recipe and it’s super easy to make.

Chocolate Mug Cake – serves 1

Ingredients:
4 tbsp white whole wheat flour
2 tbsp brown sugar
2 tbsp unsweetened cocoa
1/4 tsp baking powder
3 tbsp nondairy milk
¼+ cup unsweetened applesauce
vanilla extract
dash cinnamon
2-3 tbsp vegan chocolate chips

In a small bowl, whisk flour, sugar, cocoa, baking powder and cinnamon together, set aside. For a really sweet cake, add more sugar. In another small bowl, whisk ¼ cup applesauce, nondairy milk, and a drop or two of vanilla extract together. Pour wet into dry, then add chips, stirring to combine. 

Add another 1-2 tbsp of applesauce, until the batter is wet and resembles regular cake batter. Pour batter into a coffee cup, and microwave for three minutes (at 1000 watts – if your microwave is weaker or stronger, please adjust accordingly).

Per Serving: 276 Calories, 4.1g Fat, 59.3g Carbohydrates, 7.8g Fiber, 31.6g Sugar, 8.3g Protein

microwave chocolate cake

June 3, 2013

1-2-3 Chocolate Microwave Mug Cake

3 tablespoons unsweetened cocoa
2-3 tablespoons sugar (according to desired sweetness)
1 tablespoon flour
3 tablespoons milk
3 tablespoons vegetable oil, such as canola
3 tablespoons egg white or plain Egg Whites in a carton
1/4 teaspoon vanilla
optional:
1 teaspoon chocolate chips

*As a variation, substitute almond extract for the vanilla.
Also, you can change the chocolate chips to any flavor chips you’d like.

In a 1-1 1/2 cup microwave safe mug, blend cocoa, sugar, and flour together. Add milk, oil, egg white and vanilla. Stir vigorously for 2 minutes, (or until you’ve sung Happy Birthday 6 times!) making sure to get all ingredients incorporated. Sprinkle chocolate chips on top, if desired. Bake in microwave for 2 minutes. Check to make sure it is cooked on the bottom by lifting it a little with a spoon. If it is runny, cook 10 seconds more at a time until done. Do not overcook, as it will be rubbery. It puffs up and may overflow, but that is OK, it deflates somewhat as it cools. You want the texture to be moist and slightly undercooked. Let cool until just warm and serve with whipped cream squirted fresh from the can.
Serves one.

cool dessert idea – called ginger garden!

June 2, 2013

ginger garden dessert idea

Perfect hard boiled eggs

May 11, 2013

Perfect hard-boiled eggs:

Arrange the eggs in a single layer in a saucepan.

Add just enough tap water to cover. Bring to a  boil and cook one minute.

Remove from the heat and let them stand at least 15 minutes.

Because the water begins to cool as soon as the heat is turned off the eggs never overcook. the

Furthermore, you never wind up with split or cracked eggs. Those problems happen when you add cold eggs to boiling water and are caused by the sudden expansion of the air bubble inside the shell because of the heat.

Since eggshells are porous, if you warm the egg slowly, that air eases out gently (if you. watch closely, you’ll see the bubbles).

allergies

April 15, 2013


consider a hepa filter for bedroom. pollens through window. Signs…fatigue, itchy eyes, nose, roof of mouth, allergy testing…prick test..histamines then cause a bump…food sensitivities occur quite quickly after ingesting. Hives…itchy bumps that show up on skin driven by histamines.Variable size…very itchy, can come and go.Common cause of hives are not known and idiopathic…could be eniviromental allergens, sun screens, food, pets.


lowering blood pressure

February 25, 2013

magneseum

special magneseum to lower BP